Good Housekeeping’s Quick ‘N’ Easy Cook Book: Short-Cut Recipes

We all find ourselves short on times now-and-again. Sometimes we just spread ourselves too thin with outside (of the home) commitments, such as. working, volunteering, or chauffeuring the kids to practices and other extra curricular activities. At times like these, we might just grab fast food drive-thru or pick up something curbside to take home with us. It does not have to be that way. We can still offer our families home cooked meals with a little less effort. Not every meal has to be a gourmet, made from scratch endeavor. Shoot! Most of the time, the meals I prepare are far from gourmet or from scratch. We enjoy a simple grilled, lightly seasoned chicken breast with rice and roasted veggies. Nothing more simple than that.

short cut recipes, quick recipes, on the go cooking,
Illustration from Good Housekeeping’s Quick ‘N’ Easy Cook Book

We all find ourselves short on times now-and-again. Sometimes we just spread ourselves too thin with outside (of the home) commitments, such as. working, volunteering, or chauffeuring the kids to practices and other extra curricular activities. At times like these, we might just grab fast food drive-thru or pick up something curbside to take home with us. It does not have to be that way. We can still offer our families home cooked meals with a little less effort. Not every meal has to be a gourmet, made from scratch endeavor. Shoot! Most of the time, the meals I prepare are far from gourmet or from scratch. We enjoy a simple grilled, lightly seasoned chicken breast with rice and roasted veggies. Nothing more simple than that.

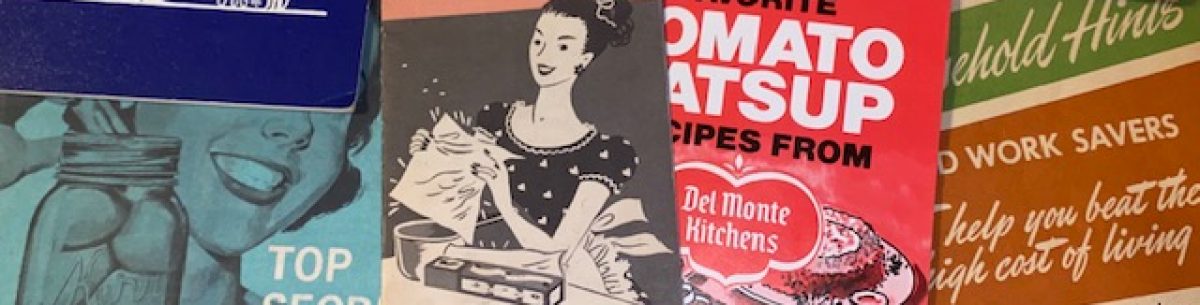
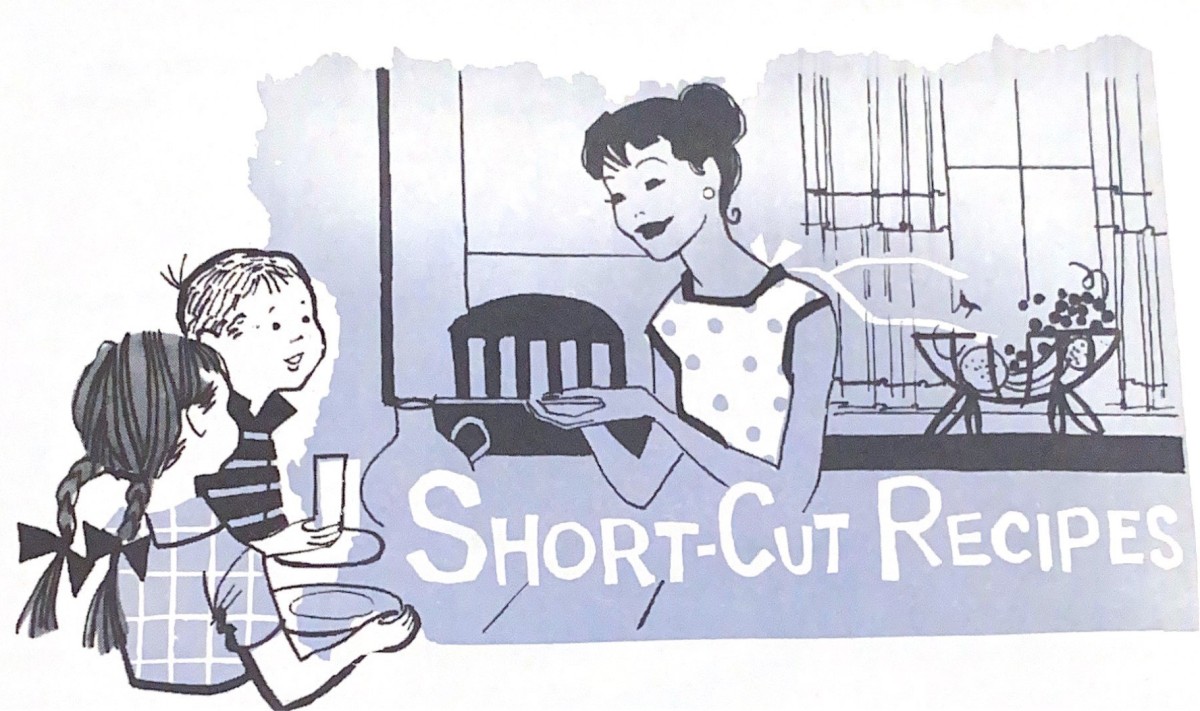
If you prefer something with a bit more flair, find some short-cut meals that work for your family. The Good Housekeeping Quick ‘N’ Easy Cook Book’s “Short Cut Recipes” section has some tasty vintage offerings to help you out on your busy days!

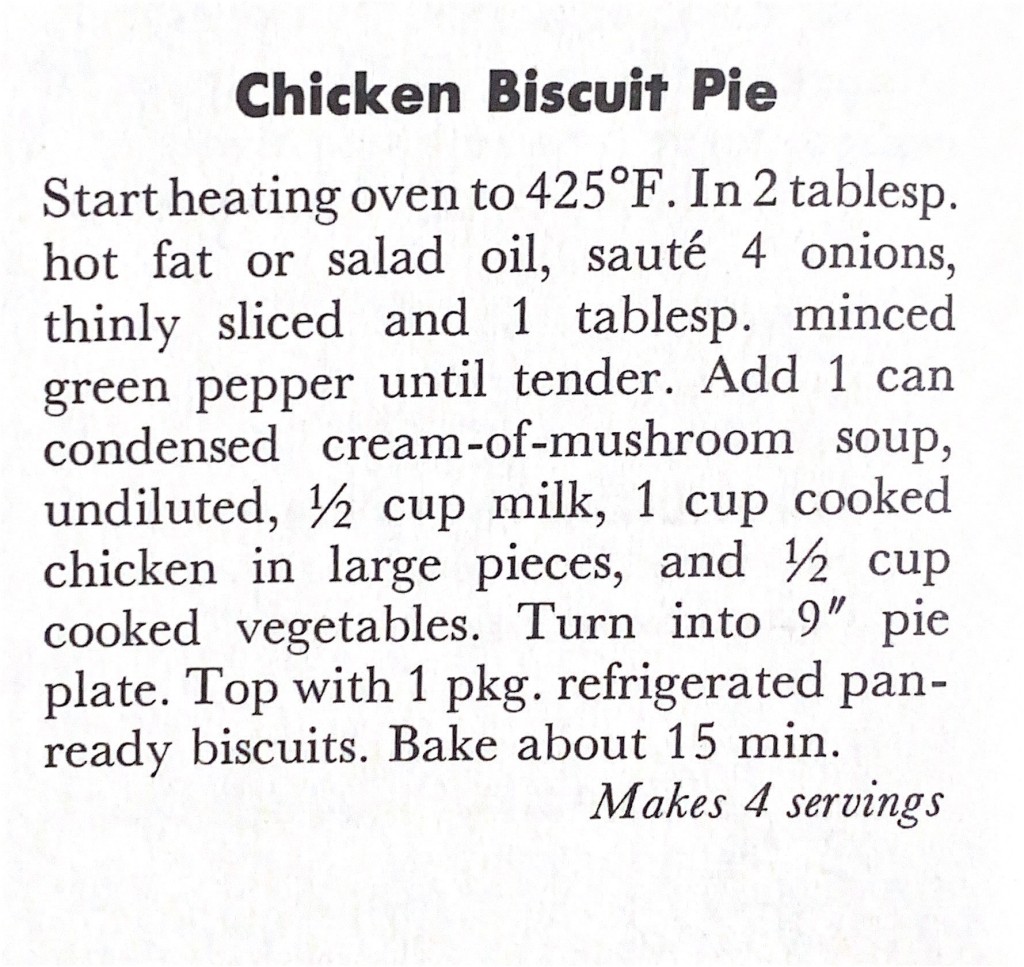
One of my favorites from the cook book is a simple Chicken Biscuit Pie. I might add some frozen veggies to bake inside or just serve them on the side.

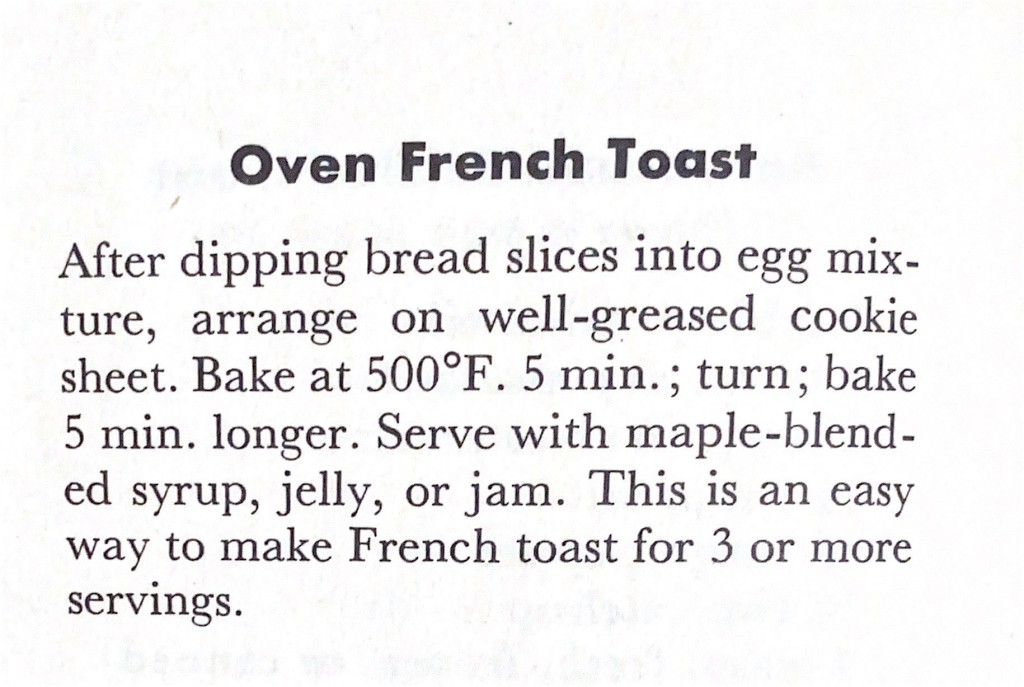
Here is a quick, simple way of making French Toast. The clean-up is a bit easier, too! Add some fresh fruit and you have a lovely breakfast on a hurried morning.

There are so many good, easy recipes in this book. If you can find a copy in your local, used bookstore or at an Antique / vintage shop, I recommend it highly. I found mine on Amazon!

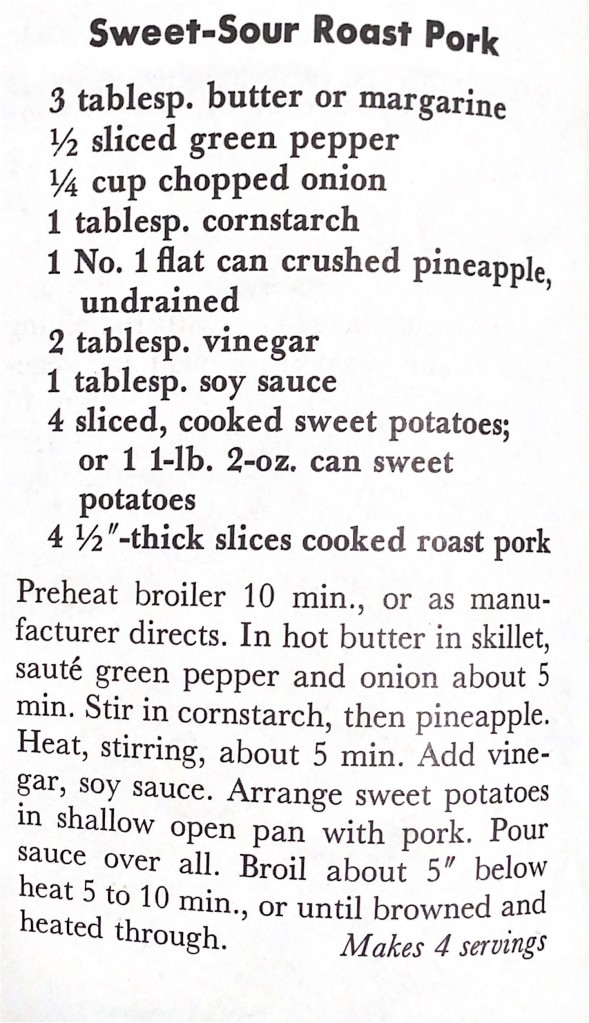
Here is one more recipe to help entice you:

There was a show on the Food Network, a few years ago, that I enjoyed called “Semi-Homemade with Sandra Lee.” She would make wonderfully delicious meals with the help of things already “made” such as boxed or frozen items. She would add to these products to make them a bit more …”special”. A more “modern” take on what the Good Housekeeping Cook Book is offering. An example of one of Sandra Lee’s meals is the Coney Island Chili Dogs that she served with Spicy Fries. She used canned chili sauce but jazzed it up with seasoning and fresh ingredients. She also used frozen fries but added spicy seasoning to give them a kick. Such an easy, yet deliciously kid friendly meal. Sandra Lee also is the author of cook books with the same theme.

photo from the Food Network

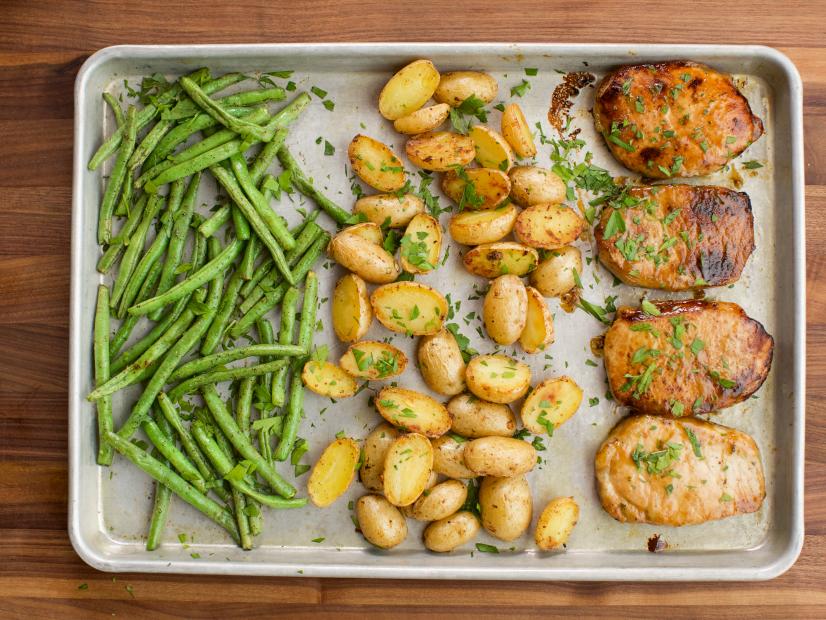
As I mentioned, above, a simple meal of chicken and veggies works for my family. One way to get this to the table in little time is the “sheet pan method”. All you do is spread your veggies on the pan with your chicken, or any choice of meat, season, and toss it the oven. So simple and so tasty. We do this with squash (sliced thick), baby carrots (right out of the bag), broccoli, onions, etc. We may serve with rice, pasta, or potatoes. If we use potatoes, they can be roasted right in the same pan. Season how you like, we sometimes use a packet of onion soup mix to add flavor. All kinds of meats do well with this way of preparing meals. Sausage or a turkey tenderloin in a great pairing.

photo from the Foods Network

Of course, if you are REALLY short on time , you could do as a good vintage mama might have done…. serve a TV Dinner!

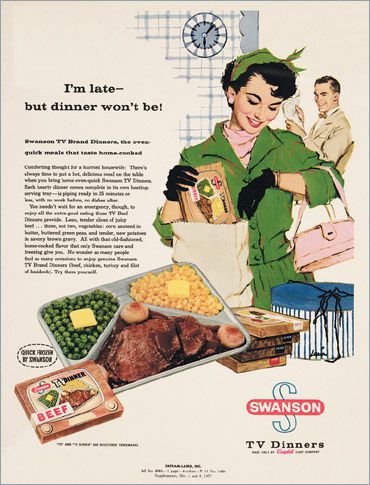
TV Dinners were invented in 1953, so the Housewife’s of yesteryear had that as an option. “According to the most widely accepted account, a Swanson salesman named Gerry Thomas conceived the company’s frozen dinners in late 1953 when he saw that the company had 260 tons of frozen turkey left over after Thanksgiving, sitting in ten refrigerated railroad cars” Smithsonian Magazine.

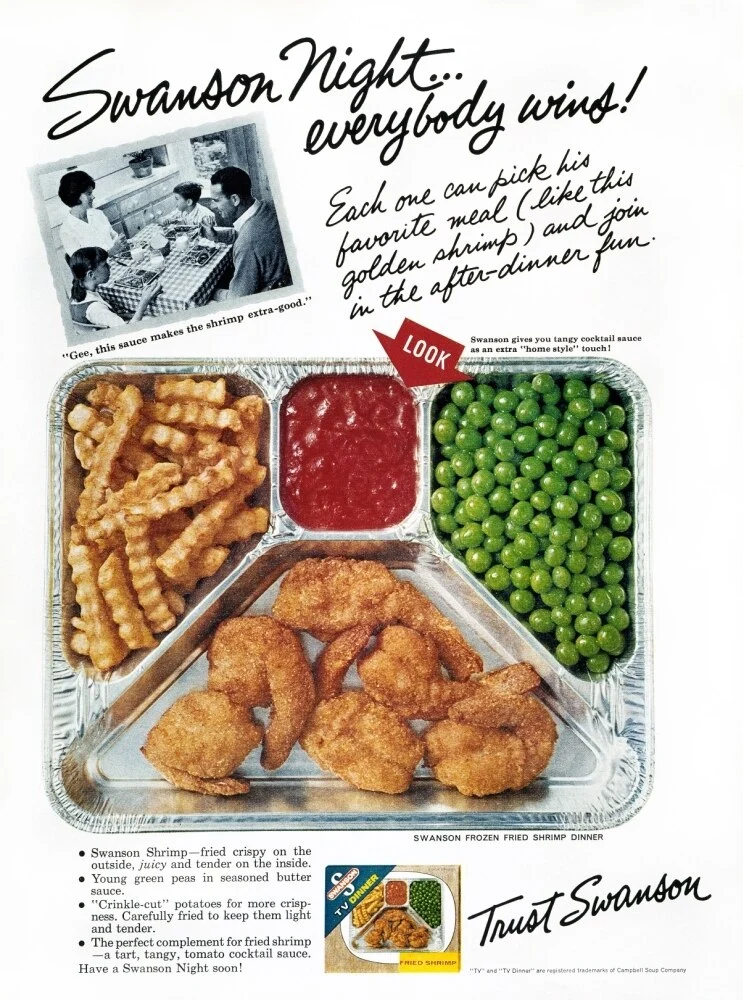
A TV Dinner offered a well rounded meal. Most included a protein, such as fried chicken or Salisbury steak, a starch, such as potatoes or pasta, a vegetable, and dessert. We have many more varieties these days with anything from a low calorie Lean Cuisine, gluten or dairy free or even vegan options.

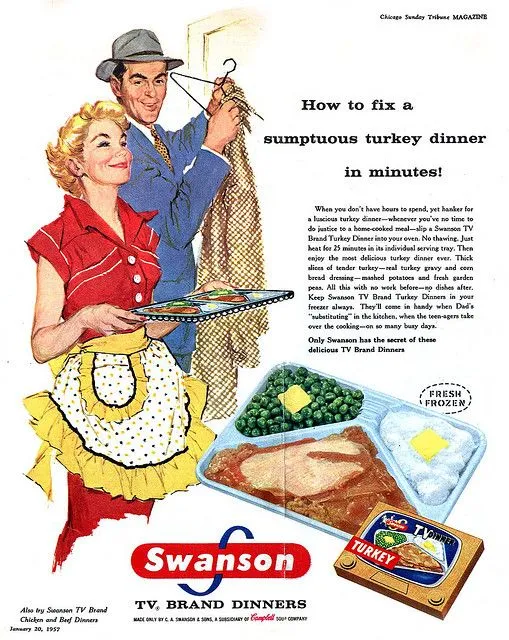
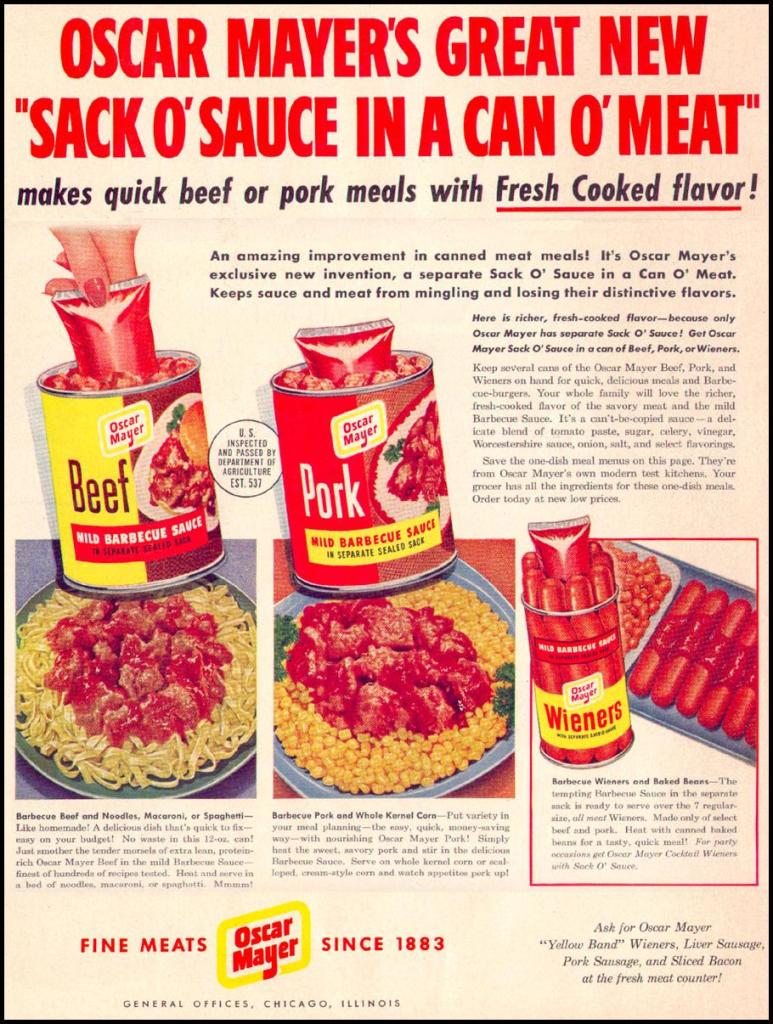
The man in the above advertisment looks happy with his TV Dinner. I would prefer to offer my family something with even a little effort (like a sheet pan or even somthing from the crock pot) but I guess in a pinch, fed is best LOL. Well, at least a TV Dinner is a bit more appetising than a meal in a can like the advertisment below. LOL!!!

We are very fortunate with the options we have in these modern times. Our frozen meals are much more appealing than a meal in an aluminum tray. We have modern appliances that help with the ease of meal preparation, such as an air fryer and instant pot. And let’s not forget, although I mentioned fast food drive thru above, that and curbside pick up was not widely available in the 1950s!!! Drive thru got its start in the 1920s but there were not the variety or location in every town like we see today.  “The drive-in concept was first popularized by a Texas chain of eateries called the Pig Stand, whose first drive-in opened on a highway connecting Dallas and Fort Worth in 1921” from History.com.

I hope this blog gave you some ideas for when you are spead thin but still need to get dinner on the table. It is so fun to compare how we live today to how our home making sisters in the past did things. Thank you so much for reading my posts! I look forward to bringing you more very soon!

XOXO

Tiffany

Come join me on TikTok….

It’s Beginning to Look a Lot Like a Vintage Holiday Season: Retro Christmas Decorations and a Brief History of the Shiny Bright Ornament

I just love a good old fashioned vintage / retro Christmas display. I am not talking about grand mas delicate laces or a hand stitched Christmas quilt, although those are wonderful, too. I am talking about the kitschy brightly colored glass ornaments, plastic light up statues, or the popcorn plastic wall hangings.

I just love a good old fashioned vintage / retro Christmas display. I am not talking about grand mas delicate laces or a hand stitched Christmas quilt, although those are wonderful, too. I am talking about the kitschy brightly colored glass ornaments, plastic light up statues, or the popcorn plastic wall hangings.

Woolworth Shiny bright Christmas ornaments.  1950s Retro Antique Holiday Decorations.
Photo from Belfast Live
Woolworth Shiny bright Christmas ornaments.  1950s Retro Antique Holiday Decorations.
Photo from Pinterest
Woolworth Shiny brite Christmas ornaments.  1950s Retro Antique Holiday Decorations.
Photo from Pinterest
Popcorn Plastic Glitter Plaque Christmas ornaments.  1950s Retro Antique Holiday Decorations.
Photo From Laurel Leaf Farm
Popcorn Plastic Glitter Plaque Christmas ornaments.  1950s Retro Antique Holiday Decorations.
Photo from Pinterest
Popcorn Plastic Glitter Plaque Christmas ornaments.  1950s Retro Antique Holiday Decorations.
You can read all about these, formally called “Glitter Plaques” on Retro Planet.

One of the most iconic vintage Christmas ornament is the Shiny Bright Glass ball ornaments. When I used to spend countless hours, before I became a parent to a little blonde tornado, browsing estate sales and antique shops, I would see these for sale. They are a bit harder to find, these days, but it is still possible to own a set….for a price. Since they are glass, and delicate, not many of the 235,000 ornaments, ordered by Woolworth in 1939, are still around.

The Shiny Brite company was founded by Max Eckardt. He was a German toymaker born in 1890.

“Though Eckardt was from Oberlind, Germany—just 20 miles away from Lauscha, a hub for glass ornament makers—he first trained in the toy industry. In 1926, though, he officially entered the ornament business with his brother, Ersnt, opening a factory in Oberlind, where his relatives and employees hand-decorated the glass balls. His company also had an office in New York City at 1107 Broadway, which later became part of the International Toy Center. Max emigrated to NYC in the late 1920s.

 
With another war on the horizon, Eckardt feared the United States’ supply of German glass ornaments would be compromised, compelling him to found, in 1937, the Shiny Brite Company. The inspiration for the name is obvious: The insides of the ornaments were coated with silver nitrate so they would stay shiny, season after season.


To keep his company afloat, Eckardt sought the help of New York’s Corning Glass Company in 1937—with the promise that Woolworth’s would place a large order if Corning could modify its glass ribbon machine, which made light bulbs, to produce ornaments. The machine switchover was a success—molten glass was shaped into balls with the help of compressed air—and Woolworth’s ordered more than 235,000 ornaments; in December 1939, the first machine-made batch was shipped to Woolworth’s Five-and-Ten-Cent Stores, where they sold for two to ten cents apiece” ( from CrackerJack23)

What a history! Corning, Woolworth….such iconic companies were involved in getting Shiny Bright a great start! If you would like to read more, and there is a lot more interesting information, please check out the CrackerJack23 blog.

Shiny Brite Christmas ornaments.  1950s Retro Antique Holiday Decorations.
Photo from Pinterest
Shiny Brite Christmas ornaments.  1950s Retro Antique Holiday Decorations.
Photo from Pinterest
Shiny Brite Christmas ornaments.  1950s Retro Antique Holiday Decorations.
Photo from Pinterest

Do you decorate with vintage holiday decorations? What are your favorites? I just love all of them.

Happy Holidays!!!

xoxo

Tiffany

Processing…
Success! You're on the list.

Vintage Inspired Hair Do – How To: Spoolies Review and First Impression

On a sunny fall afternoon, my darling hubbie needed something off of Amazon. In the sweet way he works, he just added his item to the communal Amazon cart and hit “check out”…and was generous enough to purchase all the random items I had added over the week. I always have random things in my Amazon cart, things I will probably never actually buy, unless my husband gets there before I delete everything. Anyway…this is how I became the proud owner of these weird little silicon curlers….that I did not even know were called “Spoolies.”

Modern day Spoolies from Amazon.  Review and how to at ramblingsfromahousewife.wordpress.com
Photo from a Worthington ad, no longer available.

The above photo is not an actual photo of what I have. I got the more modern knock offs. I did not know they even were a “thing” back in the “olden days.” Mine are bright pink. I had seen them advertised over the years, as one of those pesky Facebook ads. As a “girl mom” I had them in my cart many times and never bit the bullet. I mean, how many different types of rollers does a gal need? (14…a gal NEEDS 14 different types of rollers, apparently.)

Modern day Spoolies from Amazon.  Review and how to at ramblingsfromahousewife.wordpress.com
Photo from Amazon listing

They are advertised, now as in days gone by, as a comfortable alternative to the more hard curlers.

As you can see, the mom and little darling are snoozing away, comfy as can be. My experience was not the same. I found these hard and quiet disturbing to get a good comfortable position. But I feel that way with simple pin curls, as well.

Modern day Spoolies from Amazon.  Review and how to at ramblingsfromahousewife.wordpress.com
Photo found on Pinterest. The link said it was available on the Spoolies website, however I did not find it there so I am sticking with just giving Pinterest the credit.

Here is a YouTube video I made to review these cute, yet uncomfortable, rollers.

Products I used in this video

“Spoolie” type of Rollers

Big Sexy Hair Volumizing Lotion

HnP Placenta Hair Treatment

Bed Head Superstar Thickening Spray

Bed Head Manipulator Paste

Large Pink Duck Bill Clamps (This is a link to similar clamps, I got mine at TJ Maxx)

Metal Small Duck Bill Clamps

Large Metal Duck Bill Clamps

Lotta Body Setting Lotion

Black Spray Bottle (I put the Lotta Body in this. It was supposed to be a mister but it does quiet work that way, unfortunately)

I hope that this informal review of these cute curlers and the longivety of the curls has helped you make a decision on whether or not you need them.

XOXO

Tiffany

Processing…
Success! You're on the list.

Vote as You Please, but Please Vote…

“Vote as you please, but please vote” was a popular slogan in the 1950s but rings true today, just as much as back then. Voting is one of the most important acts we can do as Americans

“Vote as you please, but please vote” was a popular slogan in the 1950s but rings true today, just as much as back then. Voting is one of the most important acts we can do as Americans. Jane Russel was photographed with this slogan….and hanging the poster up while using a GUN as a hammer? That is not a “nail gun”, lady!!!

Photo from Senior Women

I do not want this to be a political blog or to say vote for this guy or that guy… but I do want to do something to encourage us to get out and vote. I have already voted so have been using my time to search for vintage voting photos and ads and want to share them with my readers. I hope you enjoy them.

Photo found on Eureka Alert
Oh my! I feel much better getting out to vote with the security and freedom of these nice long feminine pads…LOL. Photo found on Pinterest.
These kids were not legaly able to vote in the 1950s but they were able to investigate and learn how the new voting technology worked. Photo from The Sentinel
Well, if voting is going to get me an ice cold beer….count me in!!! (not really as I am more of a Tequila, Vodka, and White Claw gal….) Photo from Neat Designs
Look who came out to vote!!! Well done, Sir!!! Photo from Pinterest.
Photo found on The Cut
Wouldn’t it be great if were could vote for “no bitterness” in this years elections? Photo from Brookstone Beer Bulletin
Photo from Flagler Live
Photo from Buzz Feed
Yes, it is awesome that she is voting…but can we take a minute to appreciate her skirt? Swoon! Photo from The Cut.
Raise them Right!!! and teach them to vote. Photo from Master File

XOXO

Tiffany

Processing…
Success! You're on the list.

Quick Vintage Inspired Soup: From The 1958 Quick ‘N’ Easy Cookbook by Good Housekeeping: Vintage Ephemera

It is FINALLY getting cooler here in Texas. That means it is time for Chili…but it is also time for SOUP!!! Nothing warms me up quicker than a lunch of yummy, warm tomato soup and a grilled cheese sandwich. Chili can wait for supper time!

The soup section of Good Housekeeping’s Quick ‘N’ Easy Cook Book is included under the “Soup and Salad Suppers” title. I want to separate the two because each can be a meal on it’s own.

I have a few “hearty” soups that are my go-to lunch staples. I enjoy a good potato based soup. These are versatile and can be quiet tasty with different add-ins like brocoli and cheese, or bacon, sour cream, and cheese for a baked potato soup. All varieties of soups can be found, now-a-days, in a can and that is perfectly fine, however they are super easy to make for a quick meal.

So many soups to choose from. You will find more than 21 on varieties in todays soup aisle, I dare say!

Here is a basic Potato Soup recipe to get you started. This recipe is from AllRecipes with a bit of tweaking of my own.

  • ÂĽ cup butter
  • 1 large onion, chopped
  • 6 medium potatoes, peeled and diced
  • 3 cups water
  • 2 tablespoons chicken bouillon powder
  • ground black pepper to taste
  • 3 tablespoons all-purpose flour
  • 3 cups milk
  • 1 tablespoon dried parsley
  • ÂĽ teaspoon dried thyme
  • Melt butter in a saucepan over medium heat. Stir in the onion; cook and stir until the onion has softened and turned translucent, about 5 minutes.
  • While the onions are cooking, place the diced potatoes, carrots, water and chicken soup base (or vegetable base; see Cook’s Note) in another pot and bring to a boil. Cook until vegetables are tender, about 10 minutes. Do not overcook. Season with ground black pepper to taste.
  • Add the flour to the cooked onions to make a paste. Cook, stirring constantly, for 2 minutes. Gradually add the milk and stir well. Cook over low heat stirring constantly until warmed through. Add the potato mixture. Stir in the parsley and thyme and heat through. Serve hot.
Photo from PBS.com

As I mentioned above, a hot bowl of tomato soup along with a grilled cheese sandwich is a favorite lunch, of mine. I just use ready made soups, usually the jarred soups from La Madeline Bakery and CafĂ©. If you would rather have a homemade variety, try your hand at the Quick’N’Easy Cook Book’s version.

Recipe from Good Housekeeping’s Quick ‘N’ Easy Cook Book, page 10.

Today we have many options from Annie’s, Progressive, and independent delis and cafes that jar their soups for the mass market to even your local grocery store having a soup bar. Many still think of Campbell’s when thinking of Tomato Soup, however. Campbell’s and Heinz were popular brands in the 1950s and 1960s. Campbell’s still has a prominent spot in the grocery store soup aisle. I do not see Heinz when I am in the market but that could be just my area or because I am not looking for that brand. A quick search shows the brand is available at Walmart and online.

Photo found on Pinterest

Franco American was another popular soup brand in days gone by…way way “gone by” before the turn of the century in 1887. We Generation Xers know the name in connection to Spaghetti-O’s which were introduced in 1965. Campbell’s acquired Franco American brand in 1915 and quietly retired the name (Franco-American, not Spaghetti-O’s) in 2004, according to the Boston Globe. Campbell’s seems to be a reining kind of soups.

Photo found on Pinterst

A soup I have never made or had from a jar or can is Lobster Bisque. The Quick ‘N’ Easy Cook Book has a simple way to make this…with a little help from canned soups and lobster. I have never even considered lobster from a can.

recipe from Good Housekeeping’s Quick ‘N’ Easy Cook Book, page 11.
What d’ya know? Pepperidge Farm got in on the canned soup game in the late 1960s.

Processing…
Success! You're on the list.

Here are a few more vintage soup ads for your viewing pleasure….

photo found on Pinterest
Oh! Those rosey cheeks!!! Photo found on Saturday Evening Post.
Photo found on Pinterest.
Well isn’t this blue eyed blonde a beauty!!! Photo found on Vintage Ad Browser
Photo found on Pinterest.
I just love old ads with babies eating. This cute vintage ad was found on Flickr
Soups are great in casseroles and dips. That is a great idea for a future blog! Photo found here.

XOXO

Tiffany

Processing…
Success! You're on the list.

Would love for you to join me on Instagram and TikTok

1950’s Housewife Style – The Shirt Dress – Plus Size Vintage Inspired

I have read, countless times, in Facebook groups and other places that it is hard to find plus size vintage clothing. A few years ago, I would have agreed. This is not the case, now a days, because I have found that an open mind creates many opportunities for a plus size vintage look.

It is true, that true vintage clothing is next to impossible to find in plus sizes but when you open your mind to vintage inspired clothing, the world is your oyster. In the above video, I showcase a coolection of shirt dresses I have found at Woman Within.

Sandy Shirtwaist Dress By Ellos®

There are a few other places I consider my “go to” for vintage inspired clothing. I plan to showcase a few in future blog posts, so be sure to check back.

If you would like to read a previous blog post I did, about the Shirt Waist / Shirt Dress, please take a look at New Dresses!!!! And a Brief History of the Shirt Waist Dress. (please excuse the formatting, some of my old posts did not transfer well when I started this new blog.)

Photo found on Pinterest

XOXO

Tiffany

Processing…
Success! You're on the list.

Stretching Your Milk Supply: Inspired by World War 2 Rationing

I thought it was about time I got back to writing about how to save money and supplies in the pantry. I have been really padding my clothes closet, lately, and still have a few hauls to share…and in turn, I have neglected this series. Today, we will chat about milk.

photo from the Your Share Pamphlet

Let’s catch up with the conversation for old and new readers. This series is inspired by the World War 2 rationing advice in the pamphlet, Your Share: How to Prepare Appetizing, Healthful Meals with Foods Available Today, by Betty Crocker. I found this little pamphlet just as things were closing down due to the pandemic last Spring. Some items were becoming harder to find in the stores due to many reasons and I wanted to share the advice from this pamphlet and add some tried and true tips of my own (which I really can not lay claim to as I am sure I learned them from other along the way…). You can find the previous posts here:

Your Share: How to Prepare Appetizing, Healthful Meals with Foods Available Today

How to Stretch Meat for Delicious and Economical Meals as inspired by World War 2 Rationing

Multiply your Eggs: As inspired by World War 2 Rationing

How to Make Cheese go Further….and Reduce Your Meat Budget: Inspired by WW2 Rationing

Natures First Food

“Nothing quiet takes the place of milk – Grownups need 2 cups a day – Children need a quart.

Women and children first – if not enough for everyone, growing children take priority.

A complete protein – rich in calcium, some phosphorus and iron – with a good supply of riboflavin”.

photo from the Your Share Pamphlet

How to Stretch Milk

The best way to stretch your milk supply is to actually use it up. You want to use every last drop before it expires. When there is very little left, not enough to drink or use on cereal, add water to the jug and use for cooking. Even if it sours, you can use in waffles, pancakes, cookies, cakes….use it in your baked goods. Personally, I just prefer to not let it go bad but there is always a time that you just do not get to it in time.

Know the proper temperature to keep milk the longest. Bacteria develops in milk ten times faster at 55 degrees F than at 40 degrees F. Ideally, milk should be stored in the refrigerator at 40 degrees F or below. Storing and serving milk at this temperature extends overall shelf-life and maximizes flavor.

Take milk out of the fridge just long enough to get needed amount. Return to the coldest spot, in the refrigerator, immediately. Where is the coldest spot? Well, it is not the door of the refrigerator. The door gets the most action and milk will be subject to temperature fluctuations if stored there. Instead, store milk close to the back where the temperature is more stable and it is darkest.

Use lower temperatures for cooking, too! Cook milk mixtures in a double-boiler. Bake milk dishes in a slow, low temperature oven or steam bake.

photo from the Your Share pamphlet

Alternatives

I am sure we all prefer a fresh cold glass of milk, but there are alternatives. Evaporated milk and powdered milk, for example. Each are shelf stable and will last longer. You can store a supply of these alternatives, in your pantry, to be available when fresh milk is not. There are other “milks” available, like almond milk, that come packaged as “shelf stable”, as well, however I am not getting into these as there are so many and would probably be better with an entire series devoted to their uses.

Ad found on Pinterest

“Evaporated milk is a milk product, usually sold in cans, that is made by removing about 60 percent of the water from ordinary milk. Evaporated milk can be made from whole milk or skim milk. In either case, the milk is homogenized and then the water is removed with gentle heat. The product is sealed in cans which are then heated to kill any bacteria in the milk”, The Spruce Eats. Evaporated milk can be used, as is, or diluted with water to be used more like regular milk. I like to keep about 12 or so cans in my pantry for emergencies. I regularly rotate the cans while using in recipes.

Ad found on Pinterest

Powdered milk is regular milk dehydrated by the partial removal of water.  Dry milk powder can be reconstituted with water. The ratio is usually 1.3 cup milk powder to 1 cup water, however you may want to look at the box for instructions. Once you add the water, powdered milk can be used in any way regular milk is used. I keep a stock on hand for emergencies. I use Mylar bags and oxygen absorbers to extend the shelf life.

Ad found on Retro Adverto
Here are a few tasty ideas on how to use your milk alternatives

Evaporated Milk ideas:

Mac and Cheese: Super easy and you really do not need a traditional recipe. 8 oz of elbow macaroni, half a stick of butter (4 tablespoons, I eyeball it), salt (again, eyeball a dash). I use an instant pot on manual for 5 minutes, release pressure. Add in a can of evaporated milk (12 oz), a bag of shredded cheese (or 8 – 10 oz if you shred your own). Mix mix mix until cheese is melted and the mac and cheese is creamy and well coated. If you do not have an Instant Pot, you can just boil your elbow noodles on the stovetop, drain, then add your butter and the rest of the ingredients. Super easy and cheap! My daughter and husband prefer it over any boxed variety.

Broccoli with Cheese Sauce

Fettuccini Alfredo

Banana Puddin Milkshake

Powdered Milk Ideas:

Seriously, this is used just like regular milk when re-hydrated. But here are two links to get you started with uses and recipes.

HillBilly Housewife

Preparedness Mama

Of course, another way to stretch your milk supply is to get your calcium from alternative dairy products. Be mindful of what you have and use the best way to make each last. If you have more cheese than milk, use your cheese but be mindful that cheese lasts longer than milk and do not let your milk be neglected and sour. If you serve yogurt with breakfast, forgo the cup of milk as a drink. Drink water or juice.

XOXO

Tiffany

Processing…
Success! You're on the list.

Shein Plus Size Vintage Inspired Haul

We are back with a Shein haul. They have so many items that work with a vintage aesthetic and go up to a size 5X in some of the clothing. Shein is at a low price point so you can really have fun and experiment with interesting “looks”. Since I like the fashions of the late 1950s / early 1960s and am a plus size lady, they really offer what I am looking for. I have to keep an open mind and be creative, but that is the fun part so I am happy. In regarding sizing, you do have to be mindful of measurements because a 5X does not mean the same thing with Shein as it would with Torrid. Do not get caught up on sizing because you will miss some great things. Always measure and read the reviews. The reviews tell a lot about how the item fits!

This haul seemed to focus on the silhouette of the 1950s. The one I found in these items and the way I paired them was the hourglass type. These looks created strong shoulders, small (ish…I mean, come on….we are talking plus size here ~wink~) waist, and wide luscious hips. This was one of the most popular shapes in fashion for this time. The other popular shape was the waif like gamine figure epitomized by Audrey Hepburn, but we did not achieve that look with this haul.

Oh how I wish I could find a skirt – shirt combo like the red and white

I also, as you see in the video, bought some slacks. They did not work out. The look I was hoping for was more of a skinny pants…. what I got was circus clown. I wanted the look of Celia Foote from The Help or Mary Tyler More from her Dick Van Dyke Show days. Butt cupping and scandalous (for that time, anyway).

I’ve had this photo saved for a long time. I am not sure where I saw it originally, however there are many on Pinterest.
pic from The Help fan club site on Fan Pop. This is the only photo I could find of this glorious character wearing pants. I absolutely love her look.

I mentioned in the haul video that I was going for a cigarette pant look. That is not accurate as the cigarette pants were more loose fitting, so that is almost what I got, minus the pleating. I will do a more in depth vlog on the style of pants once I get a good look book to share.

Links to what I show in this haul

SHEIN Plus Notched Neck Puff Sleeve Top White 4X Also available in black and hot pink!

SHEIN Plus Bow Front Flared Midi Skirt 4X Also available in burgundy.

SHEIN Plus Lace Up Back Leopard Print Crop Top I got a 4X, it is sold out at the time of this haul but they often restock items.

SHEIN Plus Knot Waist Pocket Patched Striped Skirt 4X, which is now sold out. This one is similar: SHEIN Plus Paperbag Waist Slant Pocket Striped Skirt, although shorter according to photos and reviews.

The pants I purchased disappeared from my order history once I started a return. I will keep you updated on how that experience goes. As I put in my request for a return label, I got a message back saying they would issue a return to my SHEIN wallet (the method of refund I requested) but I could keep the items. That was a big surprise. Seems a bit “too good to be true” but their clothing is very inexpensive so it may cost more, for them, to process the return than to just issue it without paying for the postage and manpower the return would cost.

I hope this haul has inspired you to try out Shein. Be creative and open minded and you may find something fun to complete you favorite 1950s / 1960s vintage inspired look!

XO

Tiffany

Processing…
Success! You're on the list.

How to Make Cheese go Further….and Reduce Your Meat Budget: Inspired by WW2 Rationing

This might sound cheesy, but I think you’re really grate.

Oh how I love cheese…it just makes everything better. Such dreamy richness. Such possibilities. You can even have it if following a Low Carb eating plan…not that I am, at the moment…I mean, I should be….but you know, Covid and all…(Yes, I am blaming everything on Covid, at the moment).

I would like to share this section of the Betty Crocker vintage booklet, Your Share: How to Prepare Appetizing, Healthful Meals with Foods Available Today, while discussing the joys of cheese.

Cheese was rationed, but “cost” fewer ration points than meat, according to this booklet. Finding creative and tasty cheese dishes would help stretch your meat supplies while still providing nutritious, filling, and yummy meals.

photo from Radio.com

Here are a few cheese centered meals to get you started….

Charcuterie

This is one of my all time favorite meals. I have always been a snacky, cheese, salami, and crackers type of gal and this just adds a fancy touch to it with such little effort.

So what is charcuterie? “From the French chair (“flesh”) and cuit (“cooked”), and pronounced “shar-koo-tuh-ree,” charcuterie describes a wide range of cured meats, from hard, thin-sliced cuts to soft spreads” (from foodandwine.com). When making a charcuterie board, all you need is a wooden board (I like to use all kinds of cutting boards, TJ Maxx has so many options for a budget minded housewife), meats, cheese, and a bit of creativity. Some think there are rules to making these appetizing delights, however, I think you should just throw on what you are craving. I like to add veggies and fruits for color and taste, some people throw on a variety of nuts. A google search will give you so many ideas!

Photo from Delish.com

Mac and Cheese

We can certainly do better than the photo above! Mac and cheese does not have to be boring! Well, I guess they tried making it fun by forming into a mold and placing slices of, what appears to be, SPAM around it.

I found the easiest and tastiest mac and cheese recipe on my local moms group. Its not even a recipe, really, just a set of ingredients and instructions….well, I guess that IS a recipe LOL…. Here’s what ya do…

Put the following in the Instant Pot (or other pressure cooker)

  • 1 box of elbow macaroni
  • 4 cups water
  • 2 tsp salt
  • 2 tbsp butter

Set Instant Pot to high pressure for 4 minutes.

When the pot has done what it does…release pressure, uncover, and add the following

  • 1 cup heavy whipping cream
  • 2 cups cheese (I prefer sharp cheddar but add whatver you want…make it fancy)
  • Season to taste

Stir until melted

Make it extra special with additional add ins like bacon, ham, or veggies. You can also add variety by using different types of pasta.

photo from Houstonian

Processing…
Success! You're on the list.
photo found on Pinterest

Pimento Cheese

This is the epitome of a vintage inspired lunch, to me. My Mawma always had this and the ladies at the Assisted Living could not get enough of it at our Monday afternoon tea parties. We would make little triangle sandwhiches or stuff it in celery or tomatoes.

I have not made it, homemade, in awhile because I discovered a delicious brand available in stores called Pawleys Island Specialty Foods. It is available with or without jalapenos.

I bought this at Costco but a smaller container is available at Target, as well.

Of course, making it homemade is super easy and you can control the ingredients.

Ingredients
  • 8 ounces sharp cheddar cheese shredded
  • 8 ounces mild cheddar cheese shredded
  • 8 ounces cream cheese softened
  • ¼ cup diced pimentos
  • 1/2 teaspoon salt
  • 1/4 teaspoon  ground black pepper
  • 2 tablespoons mayonnaise (optional)

Note: Shred the cheese yourself. Cheese that is sold as “shredded” has a coating to keep it from sticking together. You want the cheese to stick together to promote creaminess.

Cream together cheddar cheese with the softened cream cheese until well combined.

Stir in pimentos and salt and pepper.

If you prefer your pimento cheese to be a bit thinner for spreading, add in optional mayonnaise or liquid from the diced pimentos to preference.

Photo found on Pinterest

Cheese makes everything just a little bit better. Next to butter, it is my favorite thing to add to a meal. And as mentioned in the Your Share booklet, there is a “cheese for every taste” so the sky’s the limit on possibilities.

XOXO

Tiffany

Before you go….

Processing…
Success! You're on the list.

Top 5 Sandcastle Kit Essentials: Inspired by Vintage Beach Ephemera

We have not been fortunate enough to take our anticipated beach trip this year but we have been enjoying the memories thru our scrapbooks and photos. One of our most beloved activities, while at the beach, is to build sandcastles.

Looking through our personal photos and reminiscing, reminded me of this vintage inspired beach themed book in my little library, Retro Beach Bash: A Sun Lover’s Guide to Food and Fun by Linda Everett. Ms. Everett has a few of these little retro themed books on all kinds of topics. They are a lot of fun to look thru.

And this is why we can’t have nice things in 2020…no social distancing!!!

I thought it would be fun to talk about all the cute supplies needed to build a perfect sandcastle while using this book as inspiration. I will add a few of our own supplies while omitting things from the list in the book…some things are just over kill when you have valuable packing space.

Building the Perfect Sandcastle Tool Kit

  1. Shovel and other “digging” tools: We have a bunch of the shovels that come with the cheap sand buckets that we have picked up at Dollar Tree or Walmart. These are perfect because they are cheap, you can have enough for everyone, and if you leave them behind or lose in the water, no big deal.
Who’s doing more work? She doesn’t care…just look at the sheer joy on her face!!! Happy Girls are the prettiest!!!

2. Buckets: This is the most important thing in your kit. It can actually be used to store your kit. You will want buckets of different sizes. They are used to carry sand, tote water from the ocean, and as molds for the larger building of your “castle”. And bonus….you can use the bucket to collect seashells when you get board with your castle. Again, get these from the dollar or big box discount store. We do have a big sturdy paint bucket from the hardware store but this is not necessary….just something we already had on hand.

These are from Five Below but they sell them EVERYWHERE…

3. Sand Molds: We just get the ones found at the beach souvenir shops or Walmart (our hometown Walmart does not carry these but the Walmart in the beach town does.) You can use anything, just depends on what shapes you want. We have also used old Jello molds and cookie cutters. A funnel makes a great tower! Have fun and be creative, no telling what you can come up with to create a unique castle.

Photo found on Pinterest. There are several molds available on Etsy or Ebay.

4. Melon Baller and Carving Tools: If you want to get extra fancy, you will need something to carve our intricate designs, doors, windows, etc. We do not usually go that far before the little one looses interests but if you are in competition mode, go for it! Carve out your architectural masterpiece.

OLYMPUS DIGITAL CAMERA

5. Spatulas, paint brushes, spray bottle: These will be used to “clean up” your castle. No need to go all Cinderella on us, but you will want to dust the excess sand away! Painters spatulas or just the kind you use for baking will do. This will give your hard work a crisper, cleaner look….right before the little tot kicks it over!

After a fun morning building….its nice to take a fishing break!

Bonus Advice: All of these “supplies” are cheap. We do not usually pack anything unless it is a favorite, hard to find mold or an antique. What we do is just buy everything once we are at the beach. Then, when we are done and packing up the car to go home, we leave them behind with a newly made friend. We always make friends at the hotel pool so there is always someone who can use them when we are gone!

Don’t forget the Coppertone!
Including this photo just because I can not get enough of the little girls happiness!!! Photo from Woman’s World.

XOXO

Tiffany

Before you go….

Processing…
Success! You're on the list.

Design a site like this with WordPress.com
Get started